Widget tool
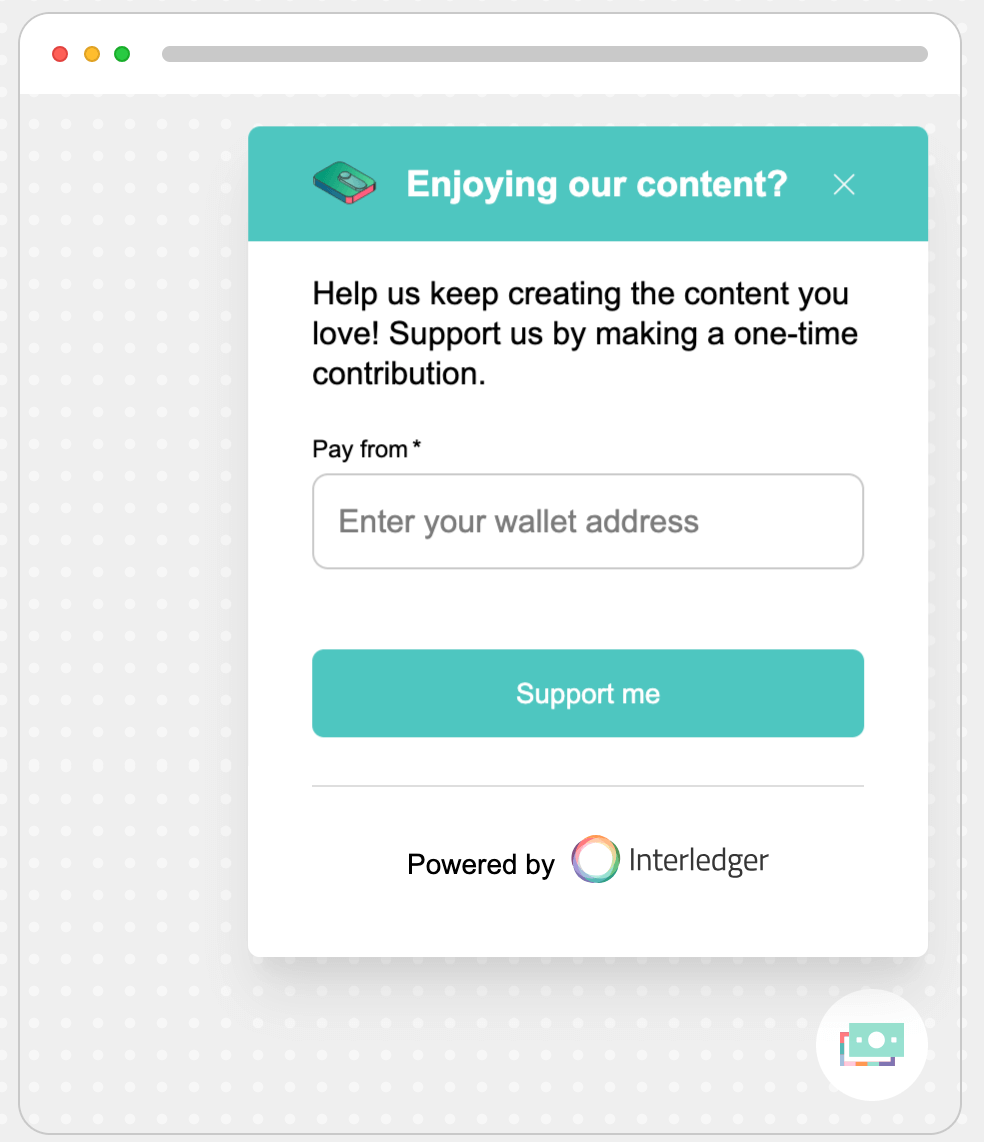
Add a payment widget to your site so visitors can send you a one-time payment. The widget appears to all visitors, even those with an active Web Monetization extension.
Before you begin
Section titled “Before you begin”- Your visitor must have a wallet address with a compatible wallet to send a payment using the widget.
- If your site is monetized with multiple wallet addresses, only the address connected to the widget will receive one-time payments.
- If your website uses Content Security Policy (CSP) headers, there are certain directives you must add to support the publisher tools embed script.
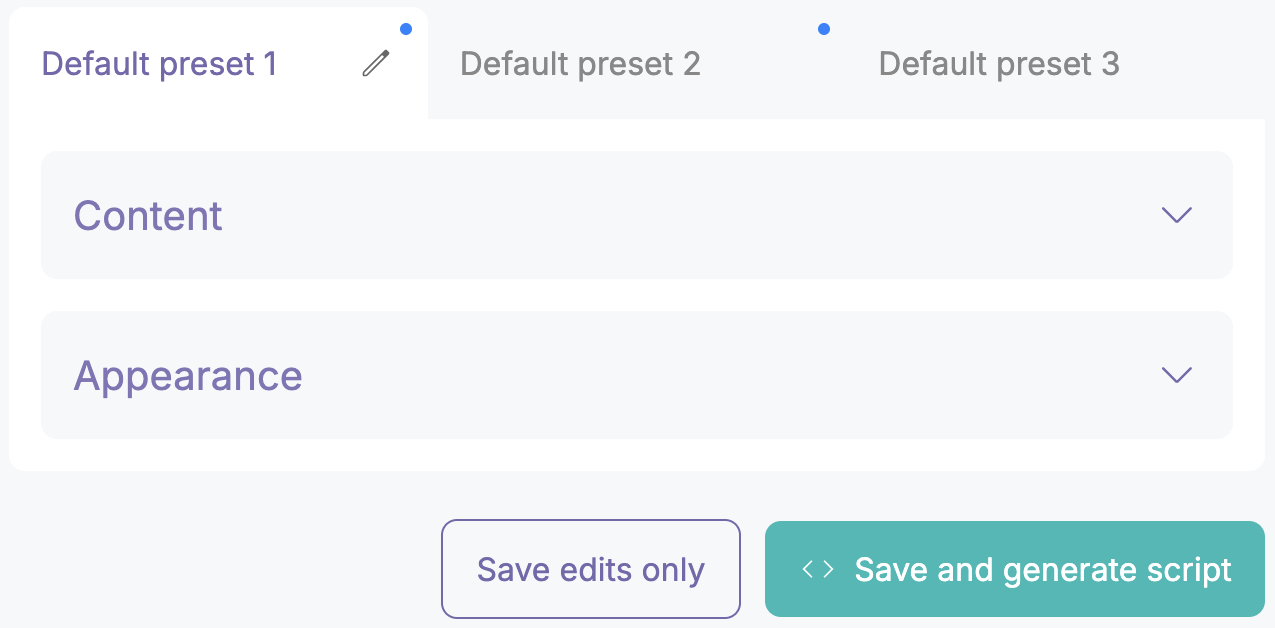
Create a new widget
Section titled “Create a new widget”Change the widget’s contents (optional)
Section titled “Change the widget’s contents (optional)”- Change the label of a configuration by selecting the pencil icon and typing over the default.
- Expand the Content drop-down menu. Enter a title for the widget or choose from the suggested options.
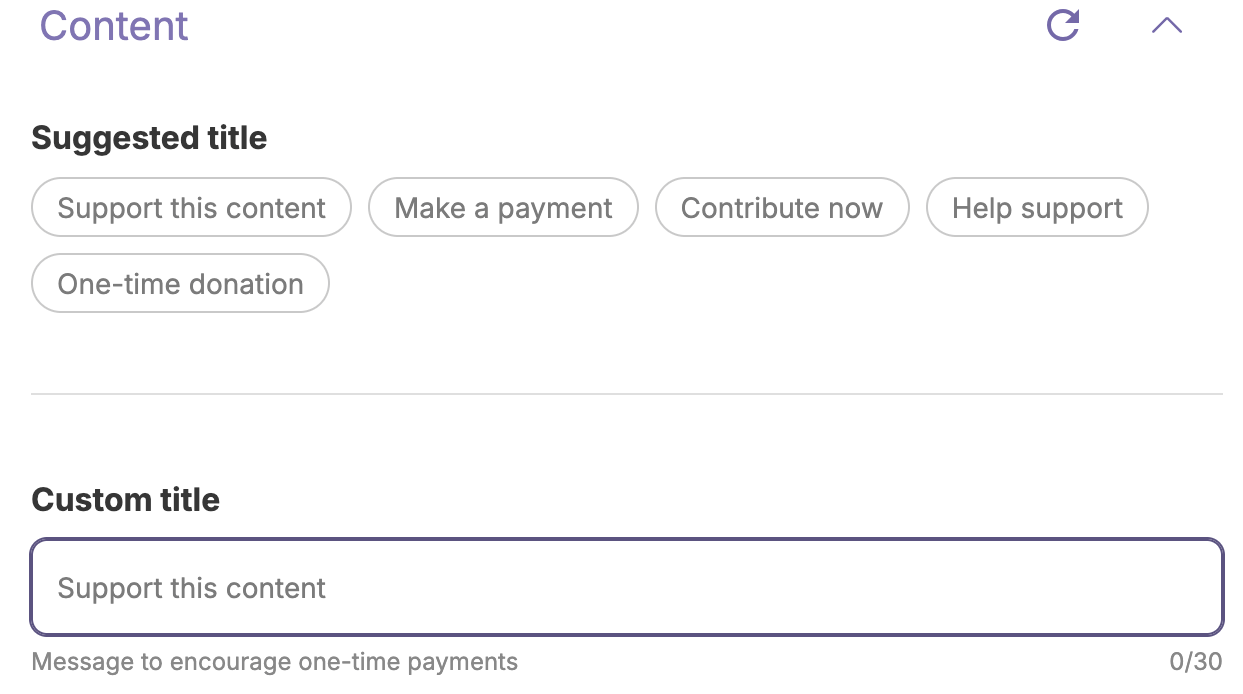
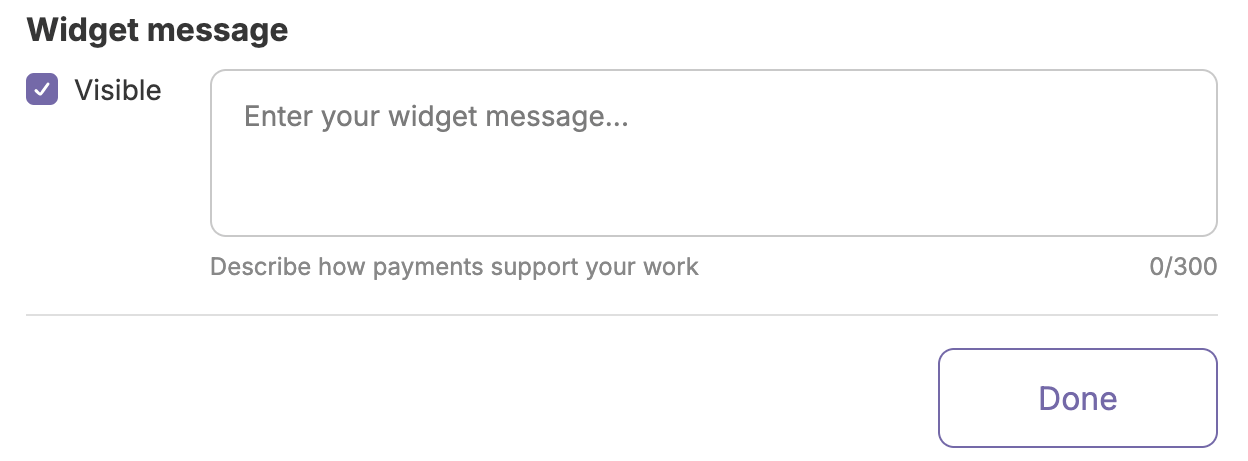
- Enter the message to show to your visitors or use the default text. We suggest changing the message so that it’s tailored specifically to your audience.
- Review your changes in the preview panel.
- Click Done to collapse the Content section.
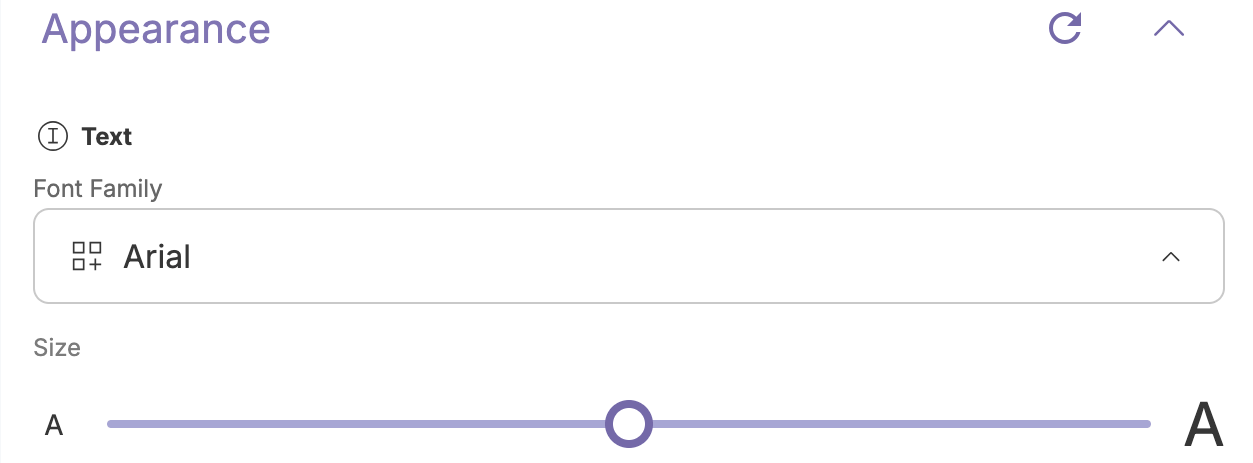
Change the widget’s appearance
Section titled “Change the widget’s appearance”- Select the font and font size to use in the widget.
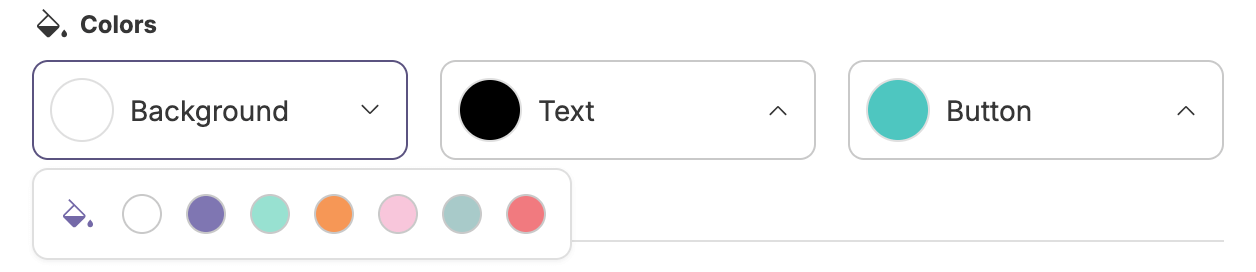
- Select the background, text, and button colors to use.
 Click the paint can icon to enter a hex value or use the color picker.
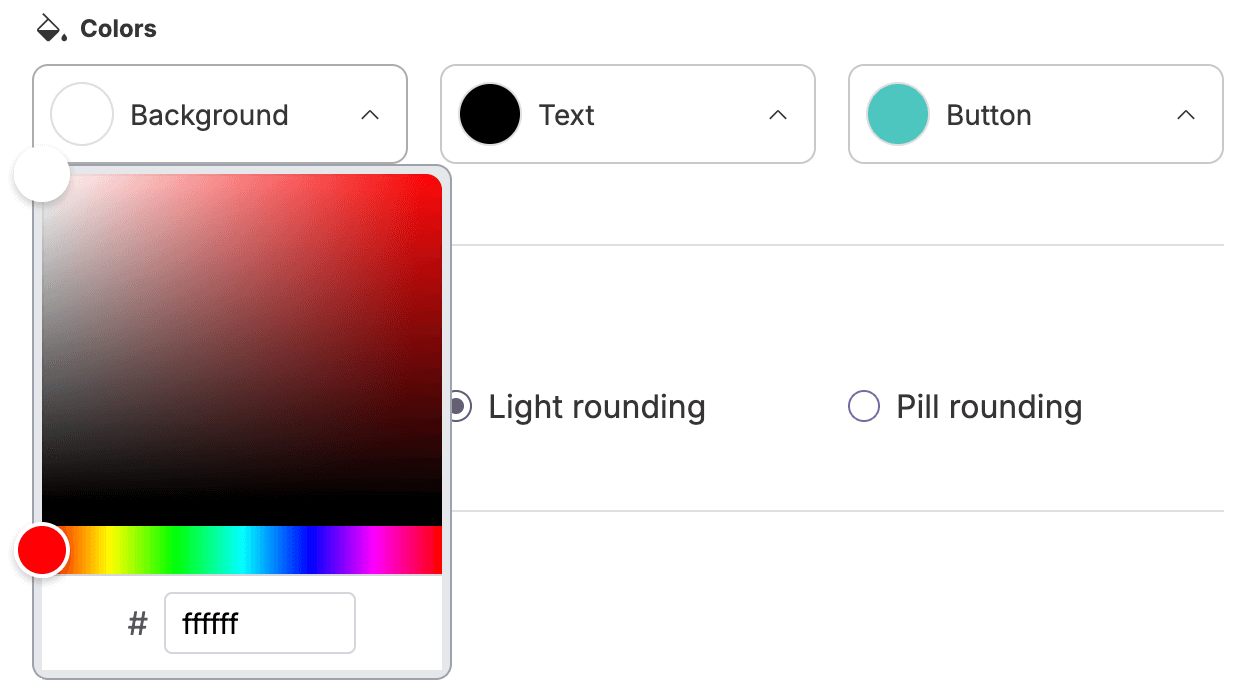
- Select the widget’s corner radius and position.
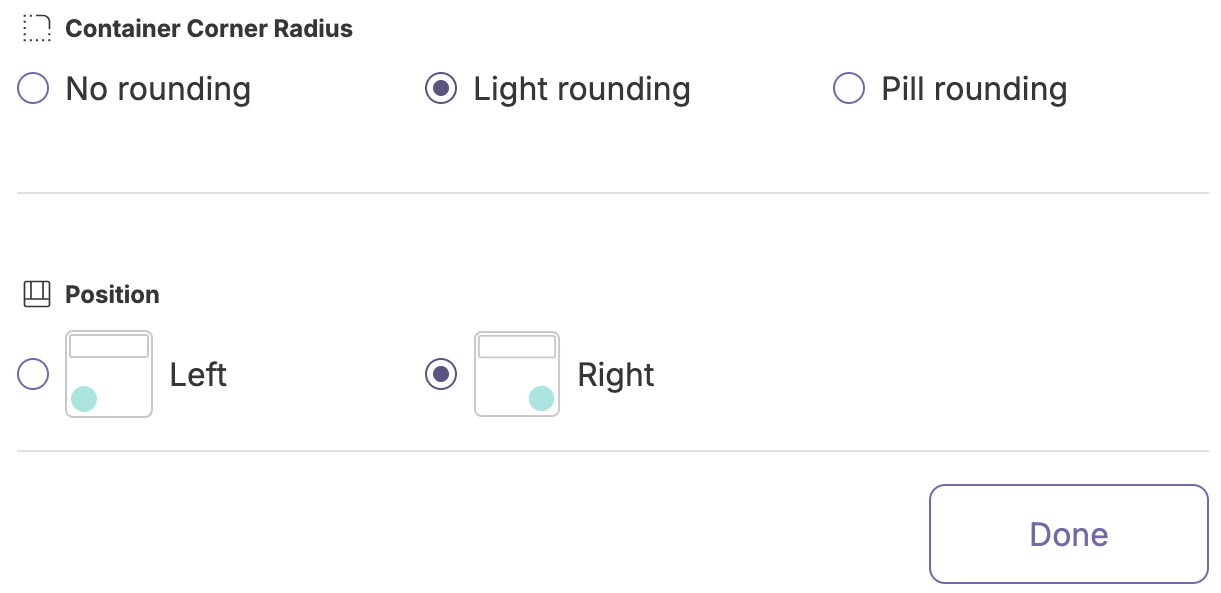
- Review your changes in the preview panel.

Generate your script
Section titled “Generate your script”- Click Save and generate script.
 A wallet confirmation prompt appears.
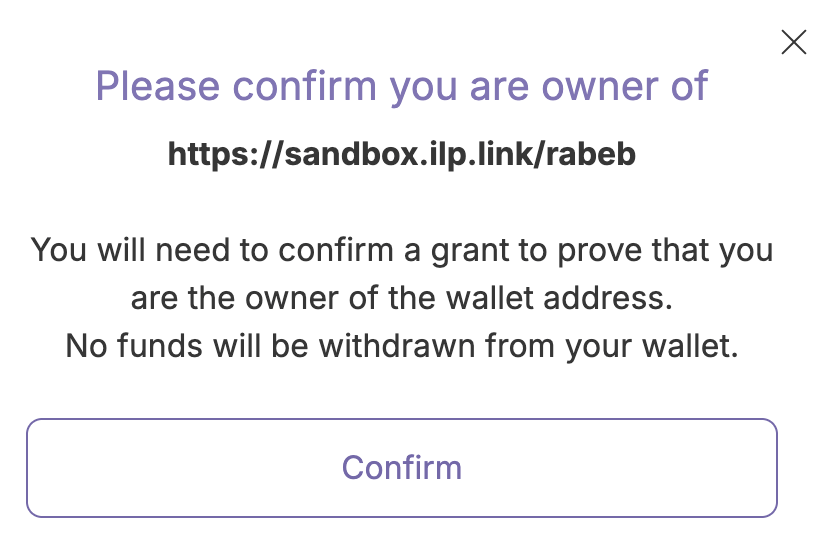
- Click Confirm. You’re directed to your wallet provider to sign in and confirm your ownership of the wallet address. After confirmation, you’ll return to the Widget tool page.
- Copy the script that appears in the overlaid screen.
Example script <scriptid="wmt-widget-init-script"type="module"src="https://tools-cdn.webmonetization.org/widget.js"data-wallet-address="https://walletprovider.com/MyWallet"data-tag="version1"></script> - Add the script to your site. We recommend placing it just before the closing
</body>tag. If you’re using a site management tool like WordPress, you’ll place the code in a script-type element. - Go to your site and check that the widget appears correctly.
You’re now ready to accept one-time payments. Remember that if your site is monetized with multiple wallet addresses that only the address connected to the widget receives one-time payments.
Change an existing widget configuration
Section titled “Change an existing widget configuration”- Enter your wallet address.
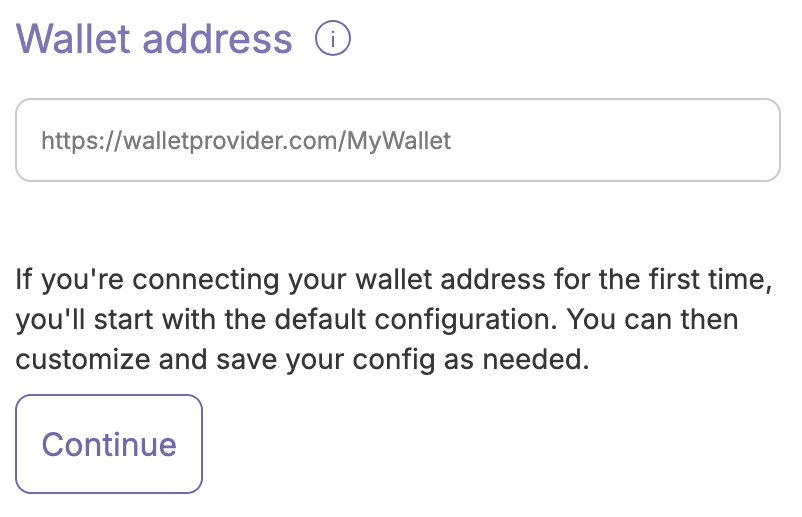
- Click Continue. If the confirmation prompt appears, you must first confirm your ownership of the wallet address.
- Make your changes, then click Save edits only. Your script remains the same. There’s no need to update your site’s code.
- Refresh a page on your site that uses the configuration’s script to verify your changes are live.
Content Security Policy (CSP) requirements
Section titled “Content Security Policy (CSP) requirements”If your website uses Content Security Policy headers, you must add the following directives to allow the publisher tools embed script to work:
| Directive | Value | Description |
|---|---|---|
script-src | https://tools-cdn.webmonetization.org | Allows loading interactive tool script from the CDN |
connect-src | https://tools-api.webmonetization.org | Allows fetching configuration data from the API |
img-src | data: https://tools-cdn.webmonetization.org | Allows loading logos/thumbnails and inline SVG icons |
style-src | https://tools-cdn.webmonetization.org | Allows loading CSS files and dynamic theme styling (custom colors/fonts) |
font-src | https://tools-cdn.webmonetization.org | Allows loading custom web fonts |
Widget tool