WordPress plugin
The Interledger Foundation’s Web Monetization Integration plugin allows you to monetize your WordPress site. All you need is a wallet address to get started.
Install and activate the plugin
Section titled “Install and activate the plugin”Before you begin, you must have a wallet address from a Web Monetization-compatible wallet.
Your WordPress instance must also be on:
- WordPress 6.8 or higher
- PHP 7.4 or higher
Search for the plugin using keyword Interledger in the plugin store. After the plugin is installed, click Activate. Web Monetization now appears as an option in your admin dashboard’s navigation menu.
You can also download and install the plugin’s zip file into your WordPress instance.
Enable Web Monetization
Section titled “Enable Web Monetization”- Select Web Monetization from your dashboard’s navigation menu.
- Select Enable Web Monetization globally.
- Enter one or more wallet addresses in the provided field. If you enter more than one, each address must be separated by a space. Payments will be split equally between all addresses.
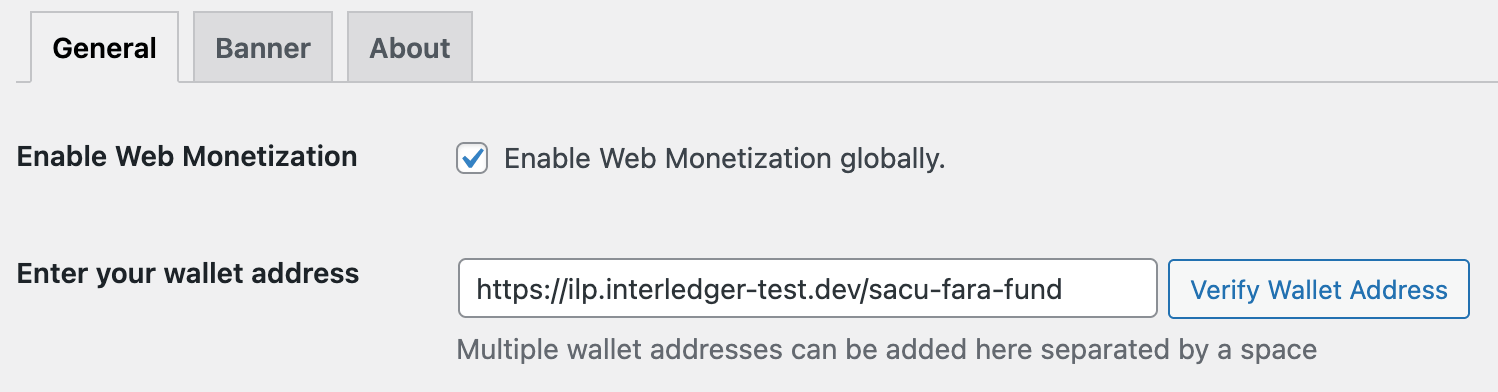
- Click Verify Wallet Address.
- If wallet verification fails, check that you entered your address correctly and that your wallet provider supports Web Monetization.
- Click Save Changes at the bottom of the page.
Configure the plugin
Section titled “Configure the plugin”In addition to web monetizing your entire site, you can monetize parts of your site based on roles, posts, and post types.
Monetize authors
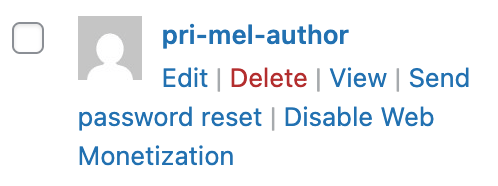
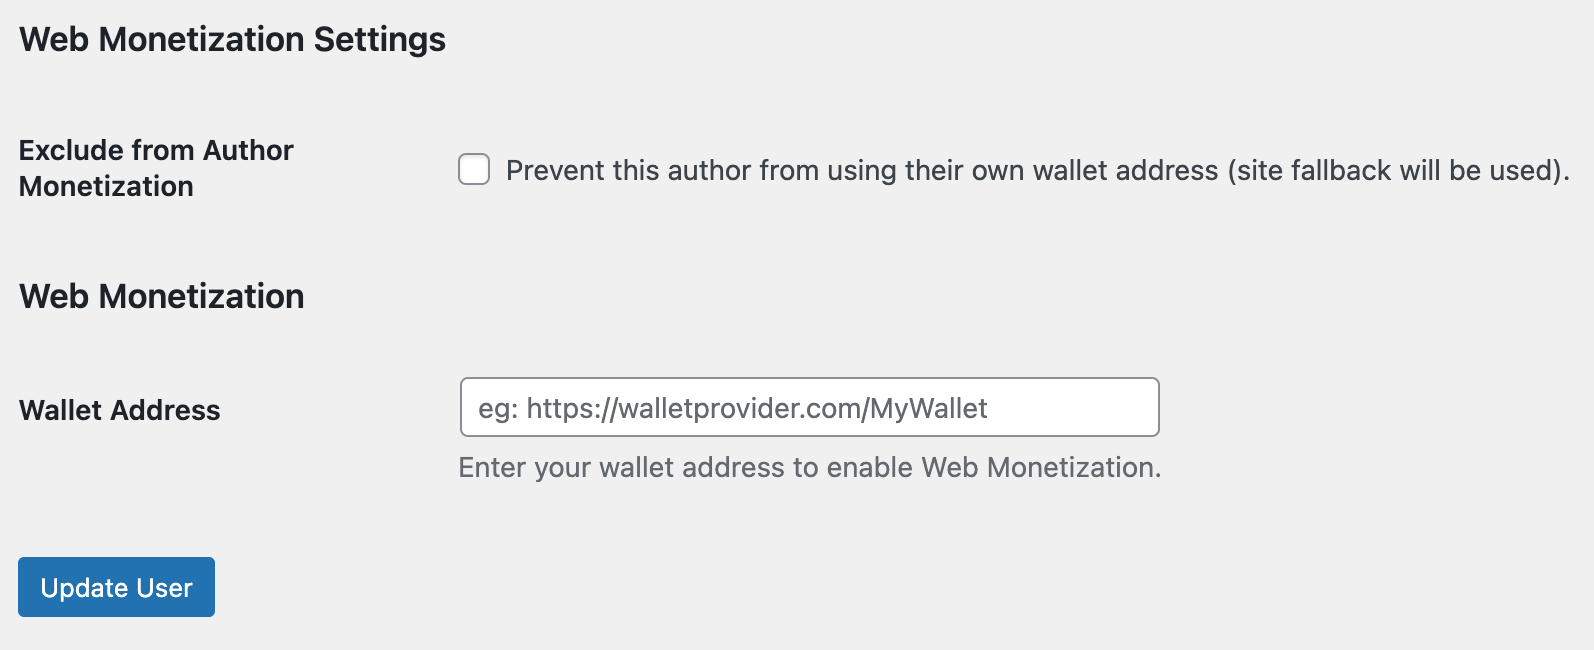
Section titled “Monetize authors”You can allow users with the Author role to enter their own wallet address in their profile.
When a web monetized visitor accesses an author’s post, the author receives the payment if your wallet field behavior setting allows it and no other address takes a higher priority.
- Select Enable Authors.

- Click Save Changes at the bottom of the page. Authors can now enter their own wallet address in their profile. As an administrator, you can also add a wallet address to an author’s profile.
You can also turn off Web Monetization for an author from the Users page and in their profile. Any wallet address already entered into the author’s profile will be saved and available if Web Monetization is re-enabled.
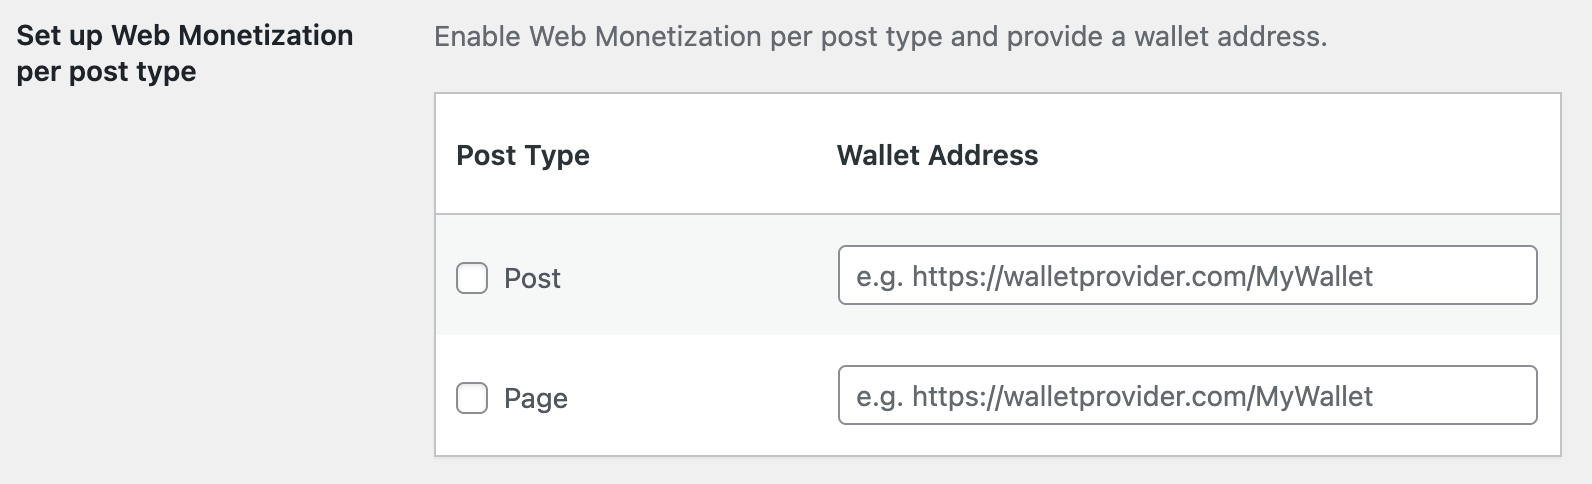
Monetize post types
Section titled “Monetize post types”WordPress offers two post types by default: post and page. You could have additional, custom post types depending on your WordPress setup.
When you monetize a post type, then all posts of that type will have the defined wallet address assigned to them. This address will receive payments as long as your wallet field behavior setting allows it and no other address takes a higher priority.
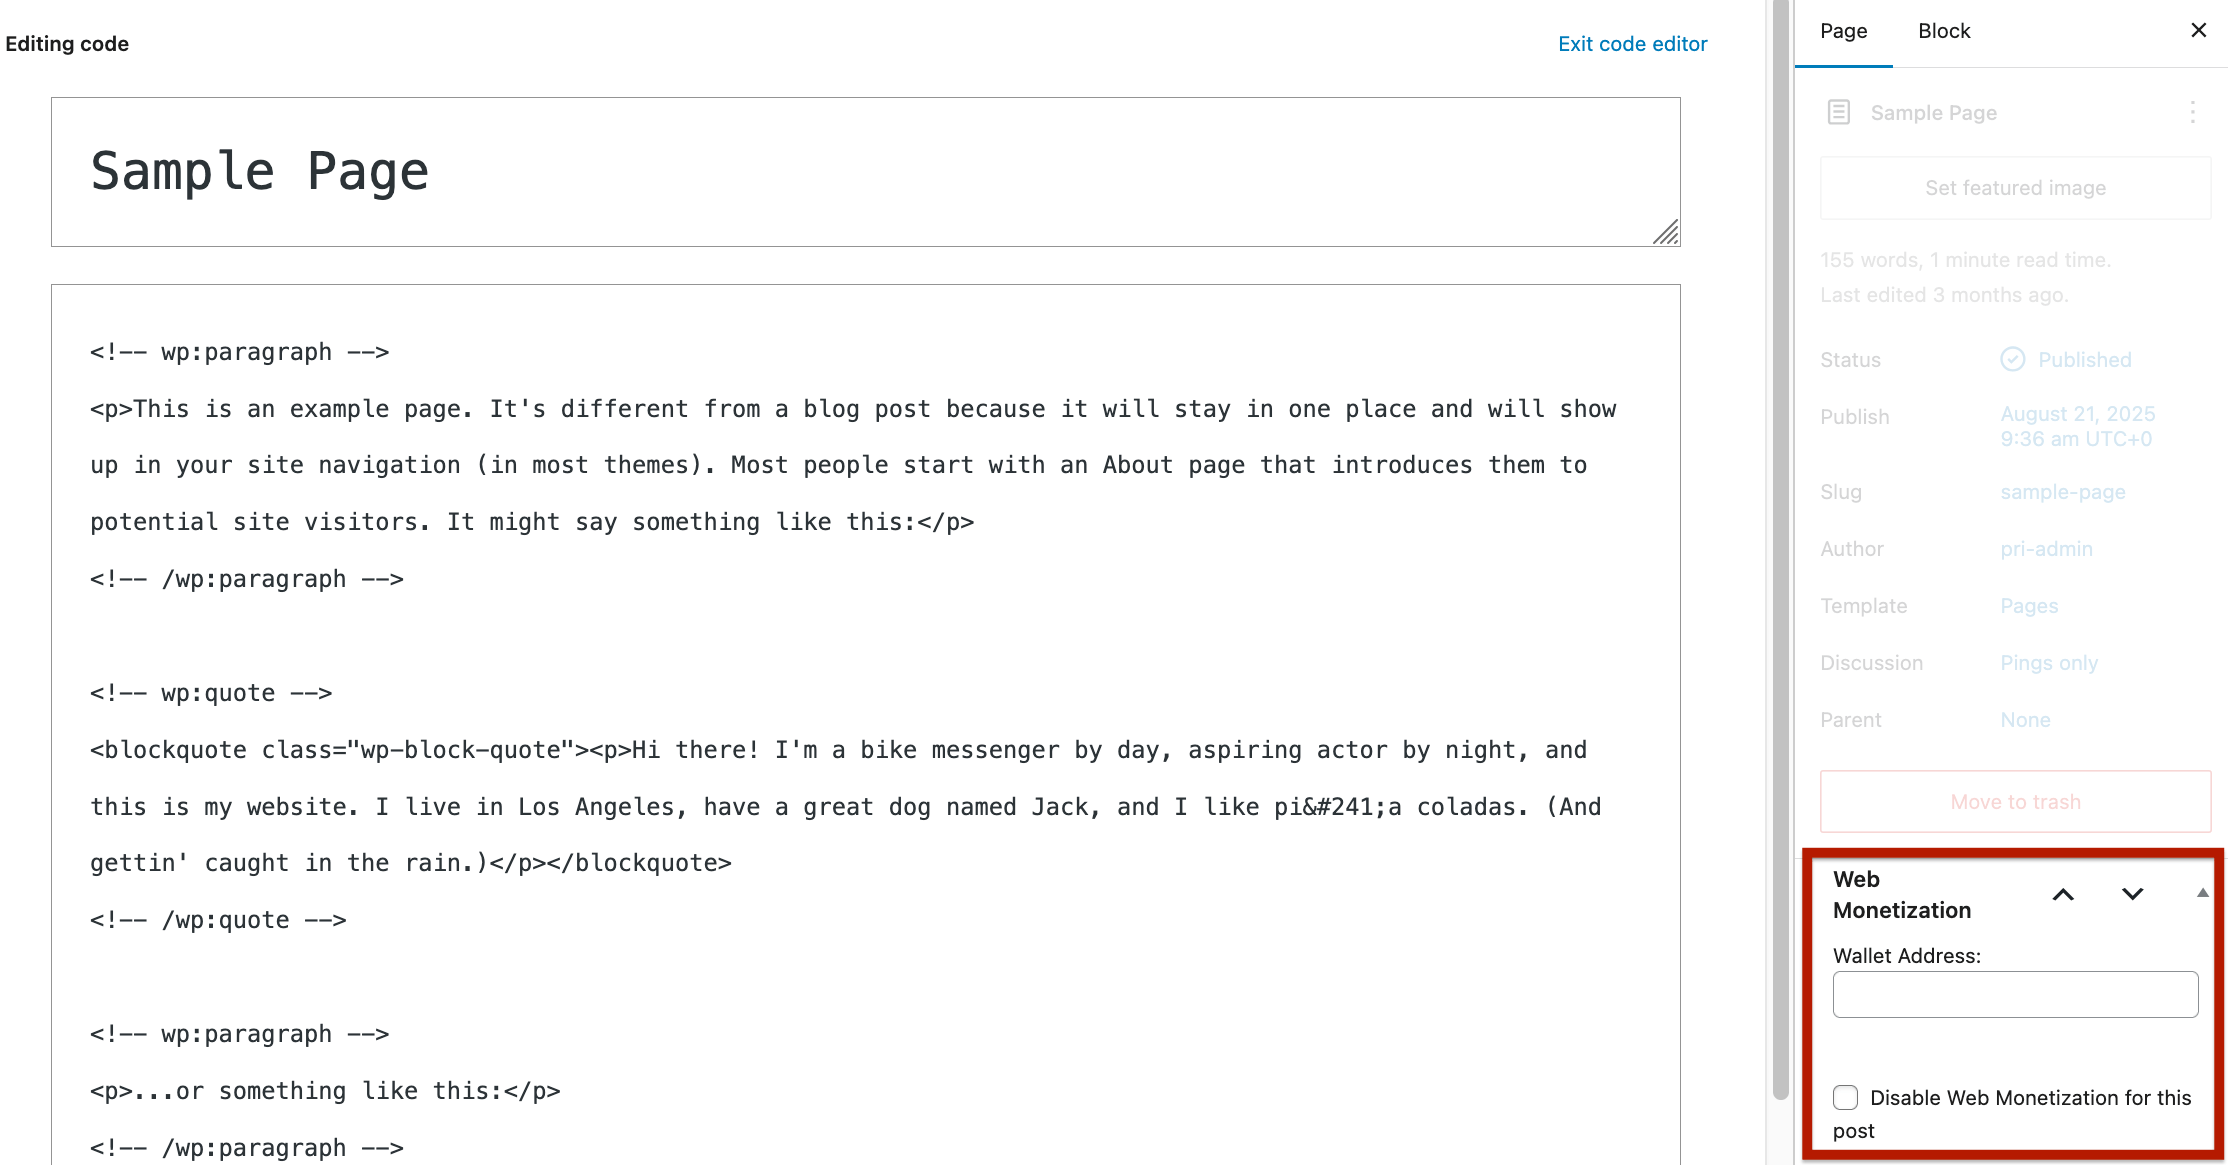
Monetize individual posts
Section titled “Monetize individual posts”You can monetize individual posts by adding a wallet address to the post itself.
Both the visual editor and the code editor contain a Page panel. Select the panel and scroll down to the Web Monetization section. From there, you can enter a wallet address or even exclude the post from being monetized.
Enable country-specific wallet addresses
Section titled “Enable country-specific wallet addresses”If you enable country-specific wallet addresses, then you can set a different wallet address to be paid based on your web monetized visitor’s country.
To use this option, your WordPress instance must either be:
- Behind Cloudflare
- Running the third-party Geolocation IP Detection plugin.
Click Add New Country Wallet, enter the country code and wallet address, then click Verify Wallet Address.
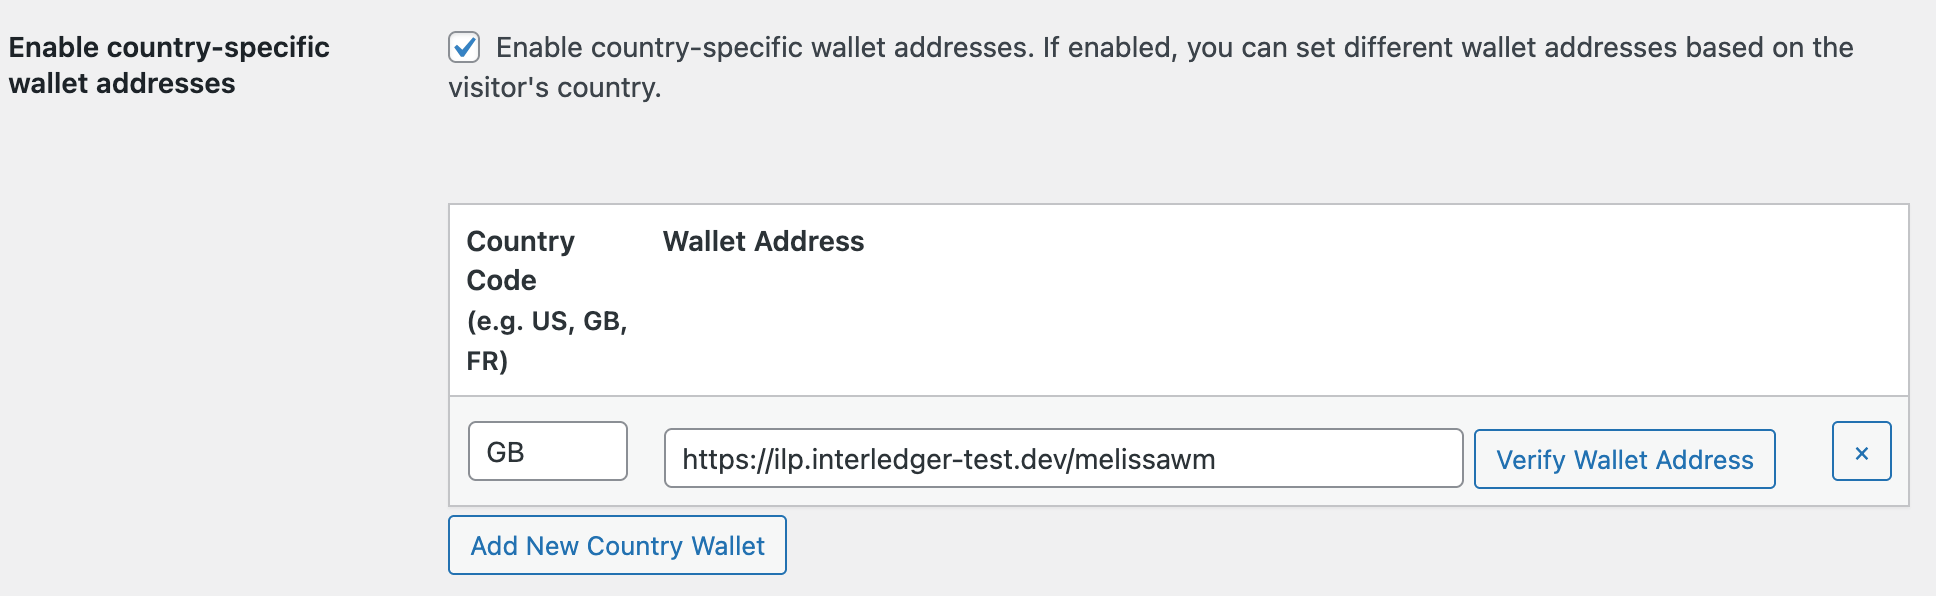
Country-specific wallet addresses will only override the wallet addresses set at the site level.
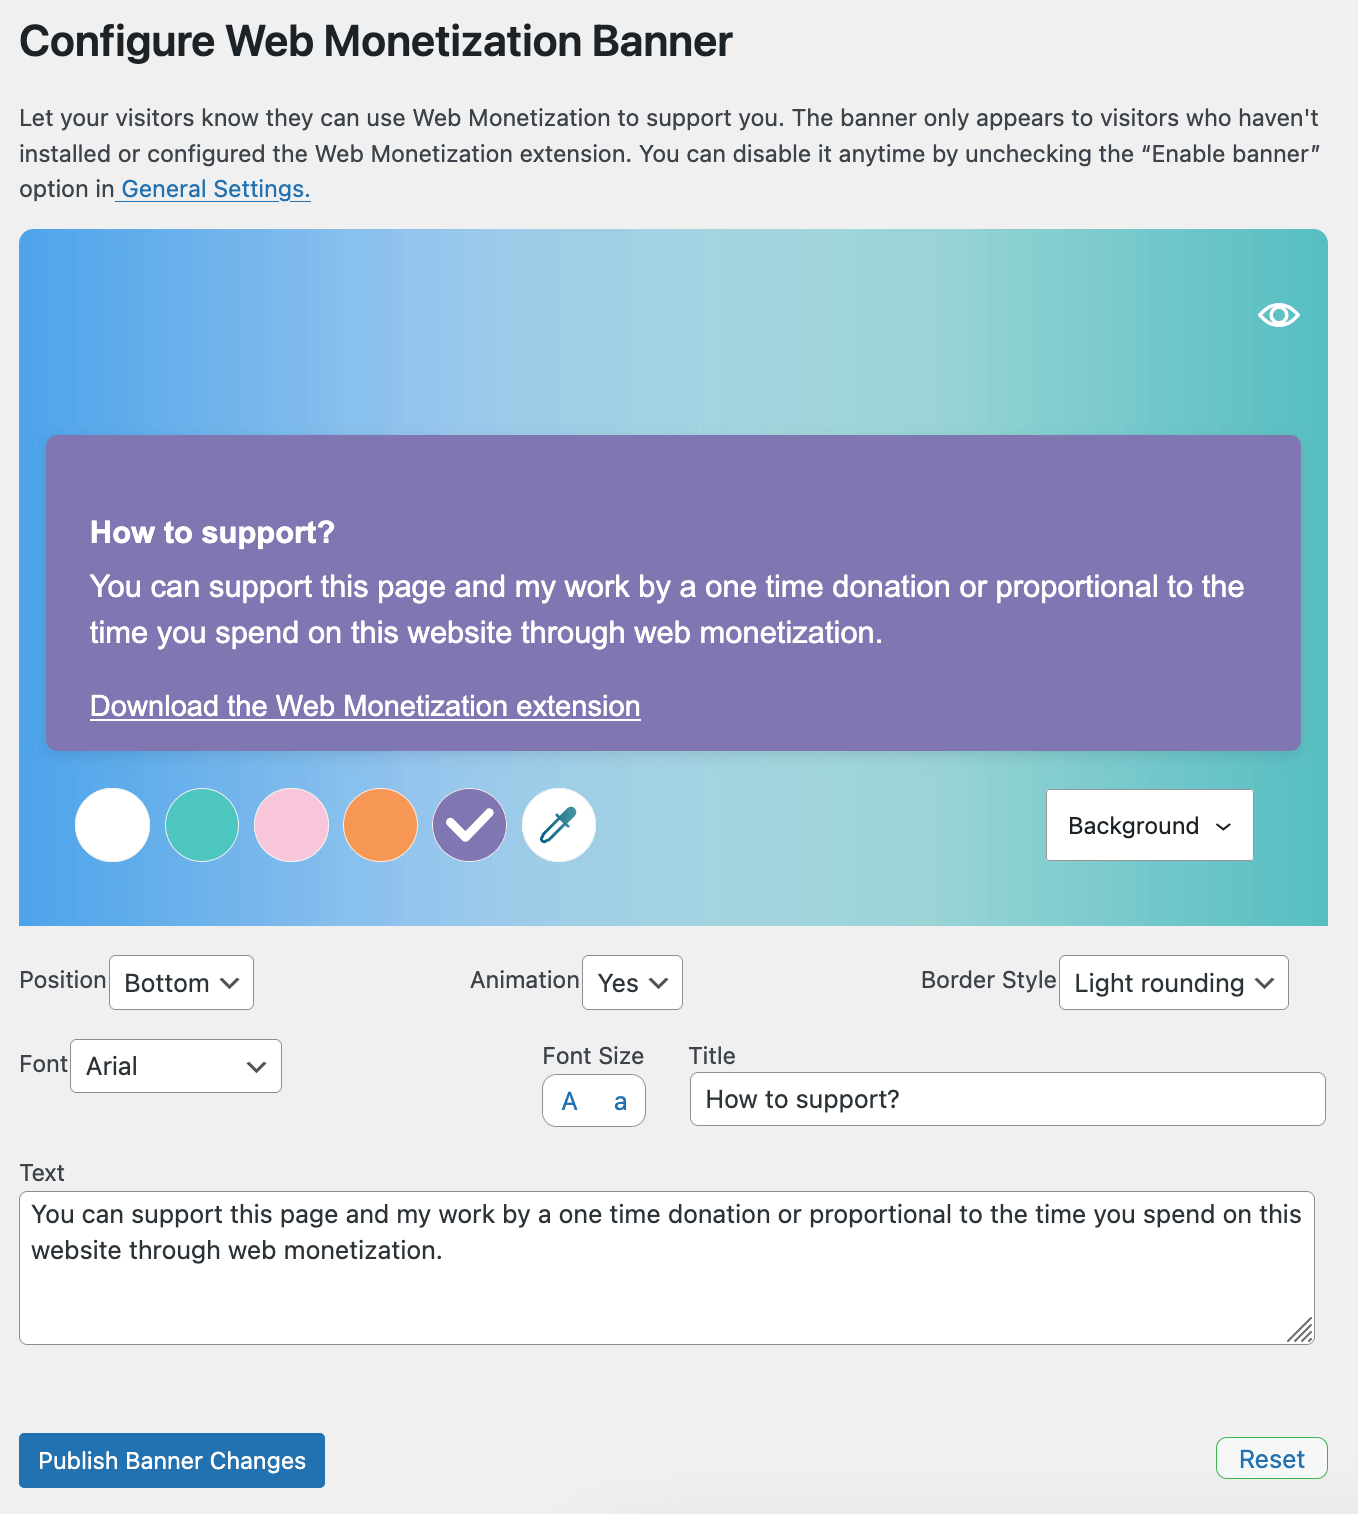
Add and customize a banner
Section titled “Add and customize a banner”Let your non-web monetized visitors know how to support you by adding a banner to your site. It appears to visitors who don’t have the Web Monetization extension installed or turned on. The banner includes a link for your visitor to download the extension from their browser’s store.
To use the banner’s default settings, select Enable the banner, then click Save Changes at the bottom of the page.

You can customize the banner from the plugin’s Banner tab, even if you aren’t ready to enable it. Make your changes, then click Publish Banner Changes. The banner won’t appear until you enable it from the General tab.
Set wallet field behavior
Section titled “Set wallet field behavior”Since the plugin allows you to enter wallet addresses in multiple places, you must decide which of these addresses should receive Web Monetization payments.
Remember, you can enter wallet addresses:
- Globally, in the plugin
- Per author, in their profile
- Per post type, in the plugin
- Per individual post, in each post
You have two options: use one wallet field or all wallet fields.

Use one wallet field
Section titled “Use one wallet field”With this option, only the wallet address in one field will receive payments. The following order is used to determine the wallet.
- Individual post/page (highest priority)
- Post type
- Author
- Site
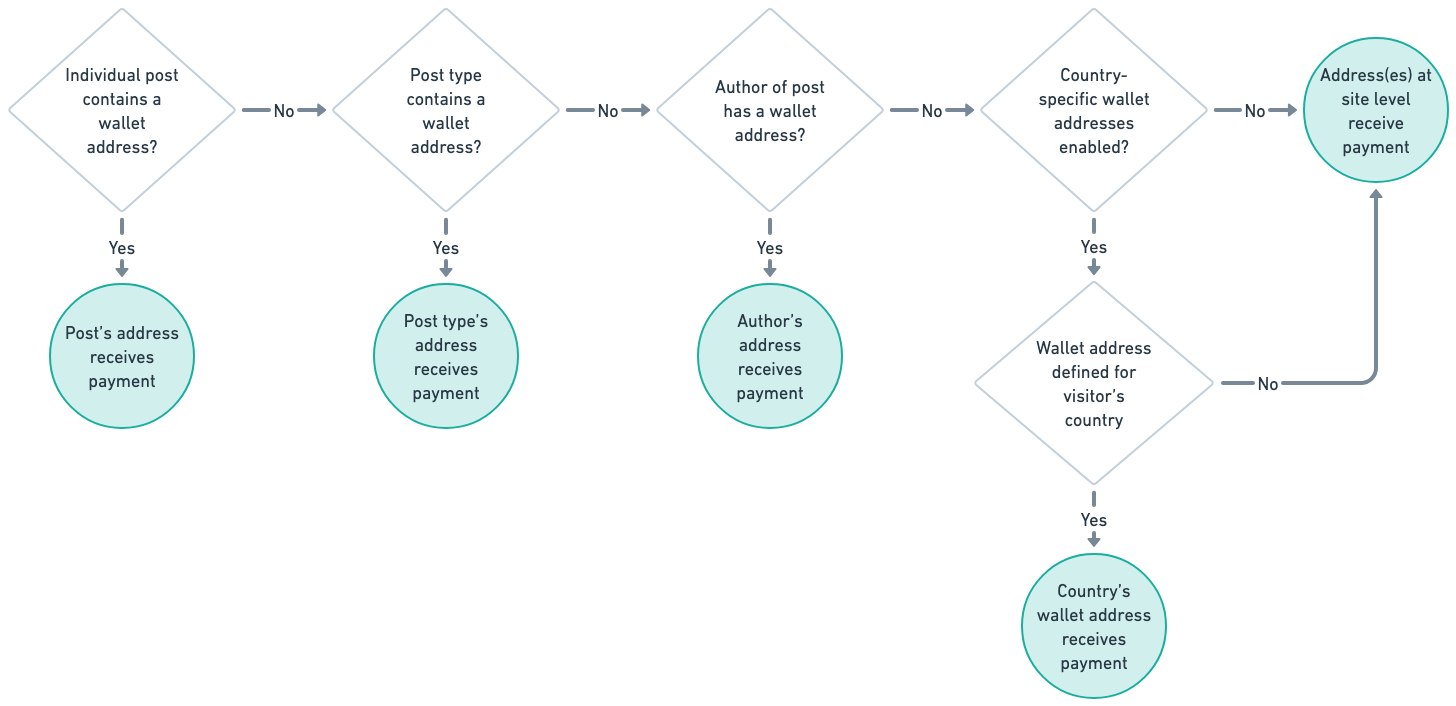
Use all wallet fields
Section titled “Use all wallet fields”With this option, all wallet addresses in all related fields will receive payments. The payments are split equally between all addresses.
For example, let’s say there’s one wallet address defined for the site. There’s a different address defined for all post types that are pages. A third address is defined in a page itself. All three addresses receive an equal split of the payment when a web monetized visitor accesses the page.